| Disclosure: The links on this page are "Affiliate Links" and while these are shown at no costs to our viewers, they generate commissions for our website(s) |
Nature and Home Crafts Projects for Your Children
One of the most universal activities that a parent can share with their child is to sit down with a box of crayons and just color, whether those coloring projects are from pre-made pages or are the works of absolute imagination. But artistic possibilities to explore with your child extend beyond the basics of standard coloring. In fact, some artistic pursuits can combine the world of creativity with academia to give your child double the benefit—a chance to be creative while learning.
Specifically, nature can provide an array of options that a child can use for creative endeavors, and this opens the door to scientific explorations. All you need to do is to safely go on a nature walk with your child—maybe discussing the things you find and the natural elements around you—and pick up some of nature’s artistic tools to create works of art. It’s a great setup since, combined, you have a scientific learning experience, supplies for creative expression, and great bonding time with your child. That’s an impressive arrangement for less than a day’s work!
So that you can prepare for upcoming crafts during your nature walk, here are several project ideas that you can use. Look over them, and plan out your supplies list to make sure you get the right mix of natural elements!
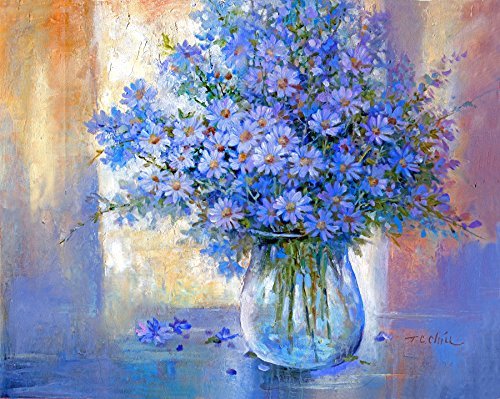
Flower Painting. This is a simple project that requires little in the way of supplies—just paper, paint, and flowers. Considering the commonality of wildflowers in fields and meadows, getting nature’s contribution to the project shouldn’t be too difficult. Just collect the flowers in a basket, jar, or even a plastic bag, and then take them home to dip them in paint. Once the top of the flower has paint on it, place the painted part on the paper and move it around in twisting motions. After that, you can choose another color, then another, then another… Let your child keep applying and twirling the colors around the paper until they’re happy with the result.
Be sure that during your nature walk, you stock up on enough flowers to tend to the task in an efficient manner. The flowers aren’t as sturdy as paintbrushes, so you shouldn’t expect any one flower to be useful for an extended period of time. Particularly if you use one flower per color, you might run through your supply quickly if you only get a dozen or so!
Pick up some dandelions as well to add another detail to your work. Just blow the dandelion’s seeds toward the painting while it’s wet, and watch as they cling there for a boost to your child’s artistic presentation (Stewart, 2013).
Rock Art. Other things that are in high supply in a natural setting are rocks, and there are numerous ways to use them for crafting. While you’re on that nature walk with your child, encourage them to choose rocks that look interesting. Once those rocks are selected, you can take them home and use them for a variety of projects, like making keychains or gluing them on pictures frames. This way, the rocks that caught your child’s eye can be showcased in useful or decorative manners.
There’s also the possibility of picking out plain-looking rocks to paint after you arrive home. You can use those rocks for the same purposes—keychains, picture frames, etc.—or in a flower garden as colorful accessories. Even something as simple as placing the rocks in a mason jar for a decoration could be an interesting and beautiful use, and one of the main aspects of the craft can be found right in your backyard.
Another rock option would be to use them in combination with other elements, like dirt, to create a terrarium in a jar for a bit of science to sit on a shelf (“Easy DIY: Terrariums,” n.d.). Your child can learn as they apply the different layers to create the craft, including the rocks, and end with an impressive finished product.
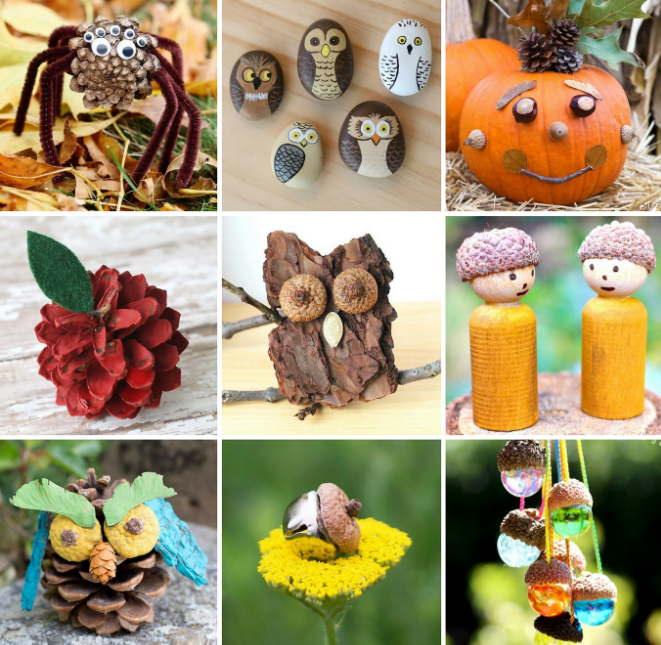
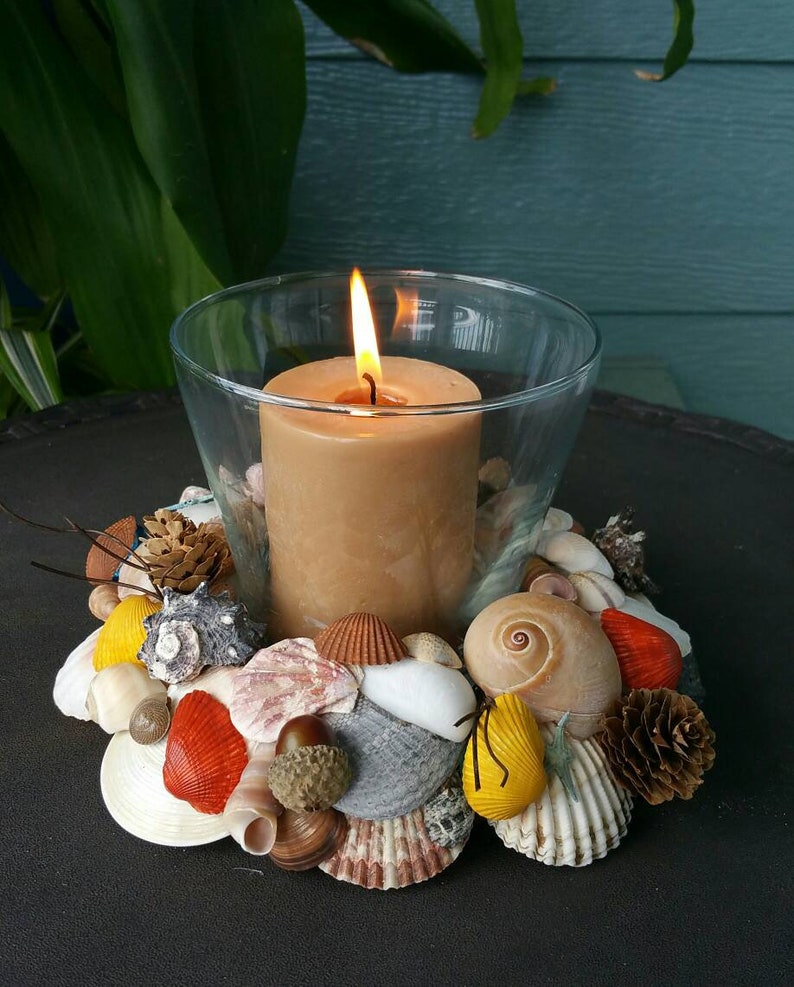
Seashells, acorns, etc. The previously mentioned idea of painting rocks can be applied to other parts of nature as well, like seashells—though your nature walk might need to be a beach walk to find the shells (or you can buy a set of them from a store). Acorns and pinecones are other possibilities for adding color to a natural product to turn it into a creative project. These painted items can be displayed through your home, and pinecones in particular have a holiday feel to boost your Christmas décor. Once more, all you need is a little nature and some color to construct wonderful crafts with your child!
Stamp leaves. One more paint idea is to use natural items—like leaves—to leave impressions on paper. It’s similar to flower painting since it requires the same additional supplies, but it’s different in that you’re not using the natural elements as brushes. In contrast as well to the acorns and rocks, you won’t be using the natural elements as platforms to build on. Instead, the natural items will be used as stamps to create a pattern on the paper.
If you choose to use leaves, for instance, collect a number of them during your nature walk, then dip one in paint (or paint it with a brush) when you return home before placing the painted side on a piece of paper. The result will be a representation of the leaf on your paper, and you can add to that image by using additional leaves dipped in or painted with assorted colors. Perhaps you can add one impression after another to build a layered look, or design the impressions in a pattern—like a circle with a common center point. You could also scatter the impressions around the entire paper, and maybe add variety to the creation by using other natural items to form different impressions—like a branch, a clover, or a series of pine needles.
Hand casts. There’s more than one way to get your child’s handprint, but if you want to bring nature into the equation, find some mud! If your nature walk is on a dry day, bring a watering can to make mud! Either way, once the mud is available, instruct your child to press their hand deep enough into the mud so that it rises near or over the tops of their fingers. After the child moves their hand, block off the area with some kind of boundary so that the handprint will be contained in a structured setting (“Save Animal Tracks as Plastic Casts,” n.d.). Then follow the directions on a container of Plaster of Paris, and pour it into the blocked-off area. When you know the plaster is dry, gently pick it up and carry it home to paint and decorate at a later time for a colorful cast of your child’s hand!
Stick windchimes. Maybe you want a nature-based craft that lets you think a little more outside of the box than just painting things or using Plaster of Paris in a handprint. If that’s the case, consider making stick windchimes since the style and décor of the project can vary depending on your child’s preferences (“Nature Craft For Kids,” 2015). All you truly need are two sticks that are about a foot in length and rope to connect the pieces of the chimes. Keep in mind though that if you only have the two sticks and rope, you’ll have a very bland decoration for your porch!

While on your nature walk then, instruct your child to look for natural items that are small enough to fit in size and weight on the windchimes, but striking enough to help build an eye-catching porch accessory. Of course, each item that’s selected for the project can be painted or altered (maybe add some glitter or gems) for a more creative design, but leaving them in their natural forms is an option as well. Once everything is assembled, tie the branches together, leaving a hoop at the top to hang the windchime, and then use what you need of the remaining rope to attach the decorative additions your child selected. The end result will be rustic, but one-of-a-kind!
If you keep these projects in mind during your nature walk, you could be in for a series of artistic moments with your child—ones that end with varied, creative projects your child can be proud of!
References
Easy DIY: Terrariums. (n.d.). The DIY Adventures . Retrieved from http://www.thediyadventures.com/2013/01/10/easy-diy-terrariums/
Steward, D. (2013, May 23). Dandelion blow painting. TeachPreschool . Retrieved from https://www.teachpreschool.org/2013/05/13/dandelion-blow-painting/
Nature Craft For Kids. (2015, July 9). PHPEarth . Retrieved from http://phpearth.com/nature-craft-for-kids.html
Save Animal Tracks as Plaster Casts. (n.d.). USGS Education . Retrieved from https://education.usgs.gov/kids/assets/tracks.pdf